

Post by Beau Leggs on Jun 24, 2005 22:49:48 GMT
How to set up an avator or put an image on a posting
edit the avators so that they are approx 70x70 pixels. Ideal have the image as a 'jpg' or 'gif'.
The pictures that you want to show must be stored somewhere on the web.
As an option go to www.photobucket.com and create a free account. Details don't have to be 100% accurate. It is fairly easy to use. It asks you to browse on your computer to select the picture files to want to upload onto it's servers.
When the pictures are uploaded, you will see them on Internet Explorer. below each image you will see the address of each picture. Use your cursor to select and highlight that address, then copy it (by pressing the 'Ctrl' button + the 'c' button).
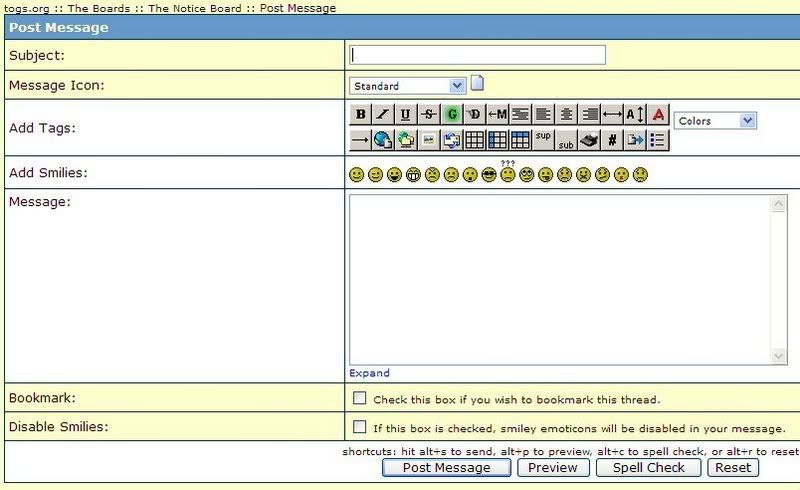
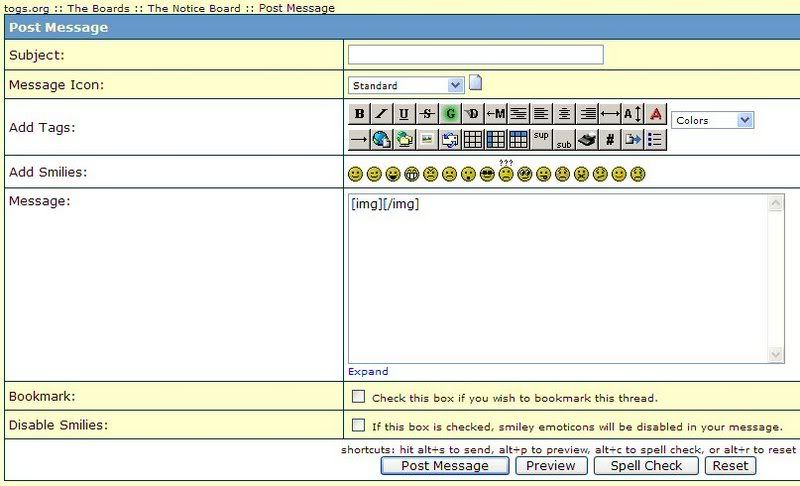
Now when you want to add your pictures to a posting, select . You will see '{img}{/img}' (but with square brackets) in the message box. between them paste the link to the picture (by pressing the 'Ctrl' button + the 'v' button).
If you want us to go through it with you in more detail, then just ask. It should be no problem once you actually do it.
If you right-click at the piccy I use you will see the address that the piccy is stored at.
If you select 'Quote' you will see how the coding works below..

How to set up and put an image on a posting
It isn't that hard to do. It is just a series of small steps you need to go through.
Step 1 - find a place on the web to store your piccy files.
Step 2 - You will need to register with them (genuine info is not required) and there is quite a few free ones out there.
Step 3 - Copy you piccy files to that site (it is called uploading, but don't worry about that).
Step 4 - each piccy file has a unique address, take a note of that address.
Step 5 - start a new post here, select and put the piccy address in between the middle two square brackets. - post thread.
So here we go...
Step 1 -go to www.photobucket.com and create a free account.
Step 2 - Details don't have to be 100% accurate. It is fairly easy to use.
Step 3 - It asks you to browse on your computer to select the picture files to want to upload onto it's servers.
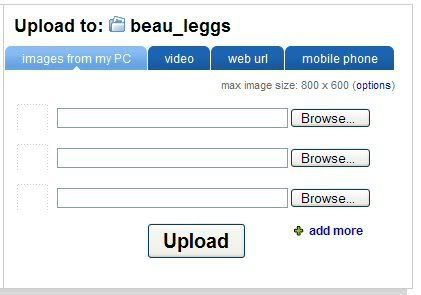
Click on the top 'Browse' button.
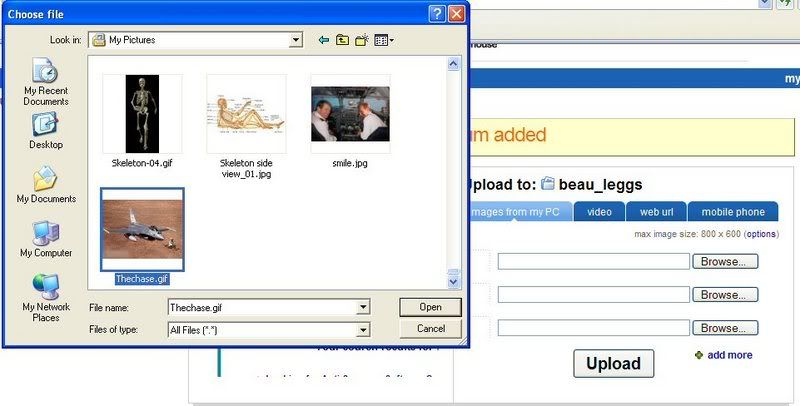
Go to the place where you piccy is stored on your computer. I am going to use a piccy called thechase.jpg as an example.
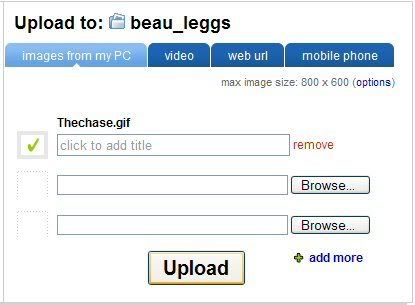
The piccy file has been selected as is ready to be uploaded. You can do more than one file, but we will leave it like that now. click on the 'Upload' button
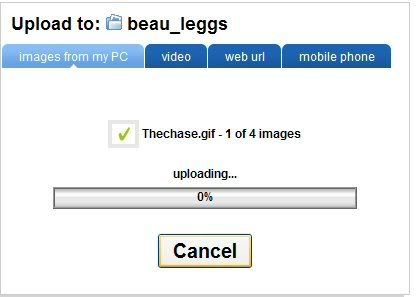
The piccy files are being transfered from the computer to the web site.

You will now see the piccies on the web site.
Step 4 - Select the text in the 'URL Link' (click on the beginning of the text and drag along to the end), then Holding down the 'Ctrl' button press the 'c' button.
Step 5 - Start a new posting or reply to an existing one.
Now select
In between the inside two square brackets, place the cursor, then Holding down the 'Ctrl' button press the 'v' button.
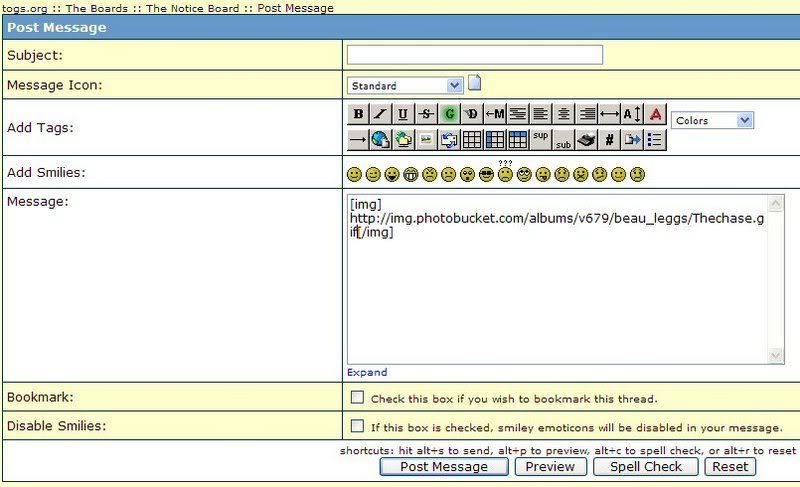
The post the posting. And you should end up with a posting like this (well if it is only the same piccy.)

To get e-mail notification of a PM being sent to you.
At the top of the screen you will see 'Hey (your name) you have 45 messages, 0 are new'.
Click on the '45 messages', this will take you to your private messages list.
In the blue bar with 'Inbox', at the left, you will see 'Preferences' on the right of this bar. Click on the 'Preferences' and you will be able to set up e-mail notification. Save the settings.
To get e-mail notification when a new post has been added to the thread
Go into your profile and select the 'Bookmarks' in the line 'Member's Bio - Modify Profile - Bookmarks'. Select 'Click here to manage your bookmarks preferences'. You then can set it up for PM or e-mail notifications. Save it and have a biscuit (optional).
What you need to do is then go to a thread (this one will do as an example). In the blue banner with the 'Page 2' (on the left side) you will see a 'Bookmark'. Select the 'Bookmark'. You will then be notified if a posting has been added. To remove the bookmark is done by selecting the 'Remove Bookmark' in the blue banner in that thread.
The 'new' button
I thought that the handy 'new' in a topic on these boards was a handy hint that new postings had been added since you last looked at it.
So naturally I would go to the last page in that topic and go back to when I remember last being online. And read from there on.
I have just realised that if you click on the 'new', it will take you to the first or the unread by you postings in that topic.
'Clicky' links
If you want to post a link to another page, site, any web address (ie www.bbc.co.uk/radio2), then select .
.
Now what you see is {url}{/url}.
Now normally you put the wed address in the middle - {url}www.bbc.co.uk/radio2{/url}.
Some addresses can look quite messy, so to make it look tidy what you do is put a more appropriate name in place where the address was to go and put the actually address just after the first 'url', ie {url=www.bbc.co.uk/radio2}Radio 2{/url}.
The 'Radio 2' can be modified, if you want to, to make it stand out. So you could make it bold, by highlighting 'Radio 2' and selecting , and thus the coding would look like this {url=www.bbc.co.uk/radio2}{b}Radio 2{/b}{/url}.
I have used curly brackets instead of the square brackets to show the coding
Here is the Radio 2 link with the proper coding: Radio 2.
And here it is with the bold impact: Radio 2.[/quote]
edit the avators so that they are approx 70x70 pixels. Ideal have the image as a 'jpg' or 'gif'.
The pictures that you want to show must be stored somewhere on the web.
As an option go to www.photobucket.com and create a free account. Details don't have to be 100% accurate. It is fairly easy to use. It asks you to browse on your computer to select the picture files to want to upload onto it's servers.
When the pictures are uploaded, you will see them on Internet Explorer. below each image you will see the address of each picture. Use your cursor to select and highlight that address, then copy it (by pressing the 'Ctrl' button + the 'c' button).
Now when you want to add your pictures to a posting, select
. You will see '{img}{/img}' (but with square brackets) in the message box. between them paste the link to the picture (by pressing the 'Ctrl' button + the 'v' button).If you want us to go through it with you in more detail, then just ask. It should be no problem once you actually do it.
If you right-click at the piccy I use you will see the address that the piccy is stored at.
If you select 'Quote' you will see how the coding works below..
How to set up and put an image on a posting
It isn't that hard to do. It is just a series of small steps you need to go through.
Step 1 - find a place on the web to store your piccy files.
Step 2 - You will need to register with them (genuine info is not required) and there is quite a few free ones out there.
Step 3 - Copy you piccy files to that site (it is called uploading, but don't worry about that).
Step 4 - each piccy file has a unique address, take a note of that address.
Step 5 - start a new post here, select
and put the piccy address in between the middle two square brackets. - post thread.So here we go...
Step 1 -go to www.photobucket.com and create a free account.
Step 2 - Details don't have to be 100% accurate. It is fairly easy to use.
Step 3 - It asks you to browse on your computer to select the picture files to want to upload onto it's servers.
Click on the top 'Browse' button.
Go to the place where you piccy is stored on your computer. I am going to use a piccy called thechase.jpg as an example.
The piccy file has been selected as is ready to be uploaded. You can do more than one file, but we will leave it like that now. click on the 'Upload' button
The piccy files are being transfered from the computer to the web site.
You will now see the piccies on the web site.
Step 4 - Select the text in the 'URL Link' (click on the beginning of the text and drag along to the end), then Holding down the 'Ctrl' button press the 'c' button.
Step 5 - Start a new posting or reply to an existing one.
Now select
In between the inside two square brackets, place the cursor, then Holding down the 'Ctrl' button press the 'v' button.
The post the posting. And you should end up with a posting like this (well if it is only the same piccy.)
To get e-mail notification of a PM being sent to you.
At the top of the screen you will see 'Hey (your name) you have 45 messages, 0 are new'.
Click on the '45 messages', this will take you to your private messages list.
In the blue bar with 'Inbox', at the left, you will see 'Preferences' on the right of this bar. Click on the 'Preferences' and you will be able to set up e-mail notification. Save the settings.
To get e-mail notification when a new post has been added to the thread
Go into your profile and select the 'Bookmarks' in the line 'Member's Bio - Modify Profile - Bookmarks'. Select 'Click here to manage your bookmarks preferences'. You then can set it up for PM or e-mail notifications. Save it and have a biscuit (optional).
What you need to do is then go to a thread (this one will do as an example). In the blue banner with the 'Page 2' (on the left side) you will see a 'Bookmark'. Select the 'Bookmark'. You will then be notified if a posting has been added. To remove the bookmark is done by selecting the 'Remove Bookmark' in the blue banner in that thread.
The 'new' button
I thought that the handy 'new' in a topic on these boards was a handy hint that new postings had been added since you last looked at it.
So naturally I would go to the last page in that topic and go back to when I remember last being online. And read from there on.
I have just realised that if you click on the 'new', it will take you to the first or the unread by you postings in that topic.
'Clicky' links
If you want to post a link to another page, site, any web address (ie www.bbc.co.uk/radio2), then select
.Now what you see is {url}{/url}.
Now normally you put the wed address in the middle - {url}www.bbc.co.uk/radio2{/url}.
Some addresses can look quite messy, so to make it look tidy what you do is put a more appropriate name in place where the address was to go and put the actually address just after the first 'url', ie {url=www.bbc.co.uk/radio2}Radio 2{/url}.
The 'Radio 2' can be modified, if you want to, to make it stand out. So you could make it bold, by highlighting 'Radio 2' and selecting
, and thus the coding would look like this {url=www.bbc.co.uk/radio2}{b}Radio 2{/b}{/url}.I have used curly brackets instead of the square brackets to show the coding
Here is the Radio 2 link with the proper coding: Radio 2.
And here it is with the bold impact: Radio 2.[/quote]

